
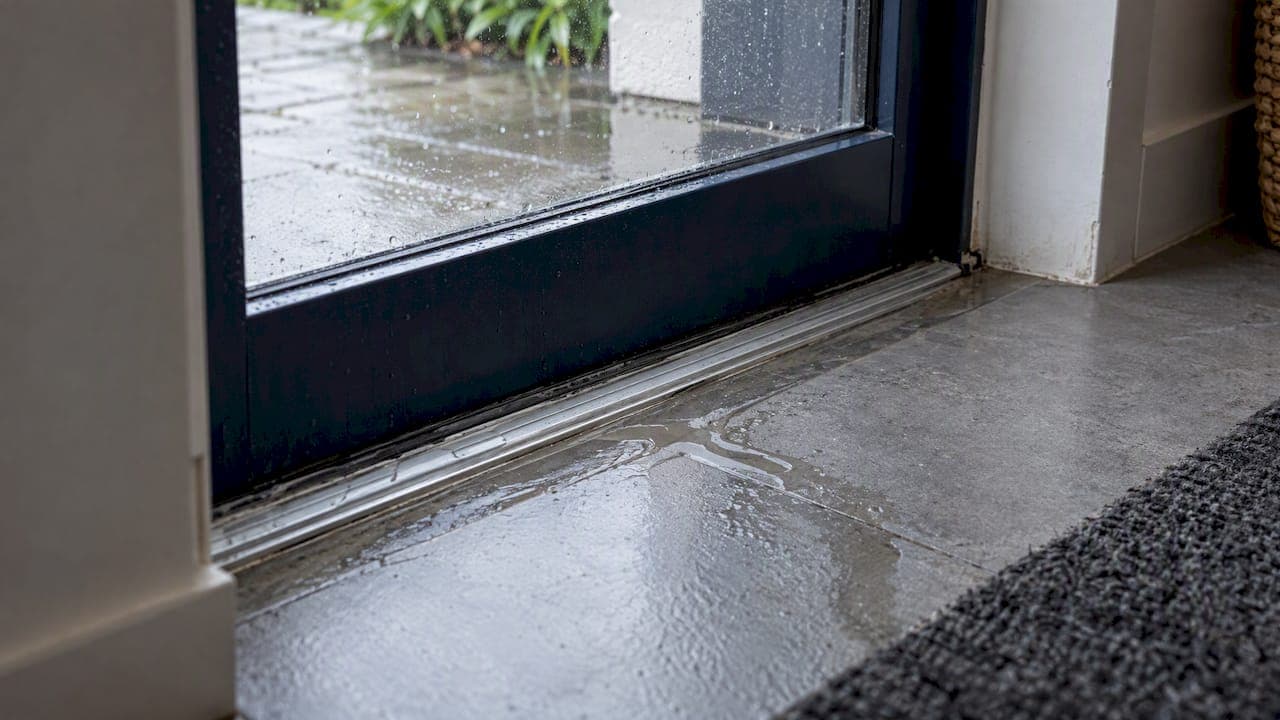
A leaking door is usually one of two problems: air and rain getting past worn seals, or water getting past a poorly installed or damaged frame, sill or flashing. The first is often a cheap fix. The second can rot framing behind the wall, so it pays to work out which one you have before you reach for the sealant. This guide shows you how to tell them apart, how to trace the entry point, what is safe to do yourself, and when to call a specialist.
TL;DR
- Work out whether you have a draught, a drip at the threshold, or water tracking in from above or beside the frame. Each has a different fix.
- Test with a hose on a dry day, starting low and working up, with someone watching inside.
- Clear drainage paths and replace tired seals before anything else. Never smother an aluminium frame in sealant, because you can block the drainage it relies on.
- Water that keeps returning, soft framing, stained linings or a door that no longer closes square calls for a professional assessment, not another tube of silicone.
- If the door itself is worn out or was never installed well, replacement is often cheaper than repeated patching.
Table of Contents
- Draught, drip or hidden leak: know which one you have
- Why exterior doors leak
- How to find where the water is coming in
- Checks and fixes you can safely do yourself
- Will a slow leak fix itself?
- Repair, assess or replace?
- Our perspective: most leaking doors are a fitting problem, not a product problem
- Need a leaking door sorted in Auckland?
- Choosing a replacement that will stay dry
- FAQ
- Sources
Draught, drip or hidden leak: know which one you have
People search "leaking doors" and mean three different things.
Air leaks. You feel cold air at the bottom or sides, or hear the wind whistle. Building Performance says draughts from under external doors are a major source of heat loss in New Zealand houses, and that door and window draughts are often a sign of maintenance needs such as faulty catches or hinges. That makes them a good early warning.
Surface water. Rain pools on the threshold or runs inside along the bottom of the door. This is common on sliding and hinged doors when drainage slots are blocked or the bottom seal has failed.
Hidden water. Stains appear on the plasterboard beside the frame, paint bubbles, carpet edges stay damp, or timber near the door feels soft. The water is getting in at the junction between the joinery and the wall, and you may only see the result some distance away.
The three are linked. New Zealand's weathertightness guidance explains that wind creates higher air pressure outside a building than inside, and air moving toward the lower-pressure zone can carry water through gaps. A door that whistles in a southerly is also a door that can push rain inside.
Why exterior doors leak
Most leaks trace back to a short list of causes.
Worn or damaged seals
Brush pile, rubber and foam seals flatten, crack and shrink. EECA lists poorly sealed doors, doors that do not fit their frames snugly, and damaged aluminium joinery among the common causes of unwanted draughts. A seal you can slide a coin under is no longer doing its job.
Doors that no longer close square
Houses move, hinges wear and rollers drop. A door that sits slightly out of square leaves a gap on one side and binds on the other. Consumer NZ notes that sticking or jamming doors can come from dirt, lack of lubrication or misalignment, and that cleaning, lubricating or re-aligning is the first step. The same logic applies to exterior doors, where a poor fit also lets weather in.
Blocked drainage in aluminium frames
Aluminium doors and windows are designed to let a little water in and send it back out through concealed drainage paths. When leaves, dust, paint or sealant block those slots, the water has nowhere to go and spills inside. This is one of the most common reasons a perfectly good aluminium door seems to leak.
Missing or failed flashing and sill detailing
The building code requires buildings to provide adequate resistance to penetration by, and accumulation of, moisture from outside. The same compliance document covers flashings, which are required to shed or divert water at sensitive areas such as the junctions of doors and other penetrations. If the flashing above or beside a door is missing, damaged or poorly lapped, water gets behind the cladding and finds its way in. No amount of work on the door itself will cure that.
Poor installation
Gaps around the frame, joinery not packed and fixed correctly, and missing seals between frame and wall all let moisture through. Installation errors tend to show up in the first few winters, which is why the warranty on workmanship matters as much as the product.
How to find where the water is coming in
Guessing leads to the wrong repair. A systematic test takes about half an hour and needs a garden hose and a second person.
- Dry everything first. Wipe the threshold and frame, and note existing stains so you can tell new water from old.
- Close and lock the door. Have your helper stand inside with a torch and a towel.
- Start low. A garden hose test starting at the lowest point and working upward helps isolate the failure point. Run water along the threshold and bottom seal for a few minutes.
- Move up in stages. Do the lower sides of the frame, then the upper sides, then the head. Spend a few minutes on each zone and note where water appears inside.
- Use a gentle flow. A soft spray that mimics rain is more useful than a jet, which can force water through a seal that would hold in normal weather.
- Record what you find. Photos and notes help a specialist, and they help if you later need to make a claim.
Keep in mind that water does not always appear where it enters. The official diagnosis guide warns that moisture problems can occur remotely from leak sources, so assessors consider the paths moisture can travel. A stain beside the door could come from a flashing higher up the wall.
Look for the visual signs as well: peeling or bubbling paint, dark staining, soft or spongy timber, and gaps between the frame and the wall. Press a screwdriver gently into timber at the base of the frame. If it sinks in easily, stop DIY and get it assessed.
Checks and fixes you can safely do yourself
These are low-risk and worth doing before you spend money on anything bigger.
1. Clear the drainage paths
Open the door and look along the bottom track or sill for small slots or weep holes. Clear them with a soft brush, a vacuum and a thin plastic strip. Pour a little water along the track and watch that it drains outside. If you have a security screen door fitted outside, check its frame too, because trapped debris there can stop water draining away.

2. Clean and lubricate
Dirty tracks and dry rollers stop sliding doors from closing fully. Clean the track, wipe the seals, and lubricate rollers and locks as Consumer NZ suggests. A door that closes properly compresses its seals properly.
3. Check hinges, catches and alignment
Tighten loose hinge screws and check that the latch pulls the door firmly against the seal. If the door has dropped, you will often see a wider gap at the top of the latch side. Small adjustments to hinges or rollers can fix this. Larger sags mean worn hardware or a frame that has moved, which is a job for a joiner.
4. Replace a worn bottom seal
A tired door sweep is the cheapest fix for a draught or a wind-driven drip at the threshold. You do not always have to take the door off. One screw-on seal sold by Bunnings, the Moroday MDS5, suits gaps of 10 to 20 mm, can be installed without removing the door, and was listed at NZ$29.17 when we checked. Measure your gap first, and check the current price on the product page.
Be realistic about what a sweep can do. It stops air and splashes. It will not fix a failed sill, a blocked drain or missing flashing.
5. Add weatherstripping around the sides and head
EECA recommends weatherstripping and draught excluders where doors are poorly sealed. Choose a product that suits the type of door and the gap, and fit it so the door still latches without force.
What not to do
Do not run silicone around everything. One supplier cautions that broad sealant application can block intentional drainage paths that the weathertightness system depends on. Seal the joint between frame and wall on the outside if it has opened up, but leave weep holes, drainage slots and the track alone.
Also be careful about sealing the house up too tightly. EECA treats airtightness as a balance: remove unintended gaps to cut heat loss, but keep controlled ventilation for air quality and moisture management. A 2020 paper on airtight buildings notes that air leakage carries roughly 1,600 times more moisture into building fabric than diffusion, which is why uncontrolled gaps matter, and it points to controlled ventilation as the best way to manage high indoor humidity and condensation.

Will a slow leak fix itself?
No, and you should not wait to see. We found no reliable guidance that a leaking door seal or joint recovers on its own, and the mechanics point the other way: a seal does not regrow, and water that gets behind linings can keep travelling and rotting framing long after the surface looks dry. A slow leak is often the most expensive kind because it goes unnoticed. If the same spot is wet after two or three rainy spells, test it and fix it.
Repair, assess or replace?
Use this as a rough guide.
| What you see | Likely cause | Next step |
|---|---|---|
| Cold air, door closes but gap visible | Worn seals or sweep | Replace seals, adjust hinges or rollers |
| Water pooled in the track, drains slowly | Blocked drainage slots | Clear the drains, then retest |
| Door sticks or does not latch | Dropped door, worn rollers or hinges | Adjust or replace hardware, or book a repair |
| Water appears after the hose test at the corners or head | Failed frame joints or flashing | Professional assessment |
| Stained linings, soft timber, musty smell | Long-term hidden leak | Professional assessment before any cosmetic repair |
| Corroded or damaged frame, repeated failures | Joinery at end of life | Quote for replacement |
When repair makes sense
If the frame is sound and straight, repair is usually the right call: new seals, new rollers or hinges, re-set glazing and cleaned drainage. Our aluminium door repair guides cover the common faults on Auckland homes in more detail, and good hardware makes a real difference to how long a fix lasts. See our premium door hardware guide if handles, locks or hinges are the problem.
When to get a professional assessment
Call someone when the leak survives the basics, when you find soft or stained material, or when you suspect the problem is in the wall rather than the door. Assessors look at moisture travel paths and the cladding, not just the joinery. Consumer NZ also advises identifying the source of dampness first, including checking for leaks and rot around windows and roofs, and telling your landlord about problems if you rent.
One point on cavities: a cavity behind cladding is there to manage water that enters around penetrations such as doors, letting it drain and dry. If that system is blocked or bridged, water can build up where you cannot see it.
When to replace
Replacement earns its cost when the frame is corroded or bent, when the door has been repaired more than once for the same fault, or when it was badly installed to begin with. Replacing also lets you upgrade. Thermally broken frames and double glazing reduce cold surfaces and condensation, and a new, correctly flashed installation removes the weak link. Our thermally broken windows guide explains the standards and trade-offs, and our door installation guide walks through what a proper install involves. Because new work must meet the building code, it also helps to understand how compliance applies to windows and doors.
Your rights if the leak is from recent work
If the door was installed or repaired recently, check your rights before paying for a second fix. Under the Consumer Guarantees Act, tradespeople must carry out work with reasonable care and skill. If they do not, you can ask them to fix it at no cost, and if they cannot or will not, you can hire someone else and claim the cost back. The same Consumer NZ guide explains that the Building Act requires warranties that residential building work is done competently with suitable materials, which apply for 10 years, with a specific 12-month defect repair period. Keep your contract, invoices and photos of the leak.
Our perspective: most leaking doors are a fitting problem, not a product problem
We only work in aluminium joinery, and we see the same pattern across Auckland homes. Customers assume the door has worn out, when often the seals have aged, the drainage is blocked or the unit was fitted without enough attention to the junction with the wall. Aluminium itself is durable and handles our wet, windy climate well. What fails is usually the detail around it.
That is why we treat installation as the product. A precise fit, correct packing and fixing, and careful sealing at the wall junction decide whether a door stays dry in ten winters. It is also why we back our work with a five-year workmanship warranty.
Our advice is simple. Do the cheap checks first: drains, seals, alignment. If water still gets in, do not keep patching. Get someone to find the cause, and replace the unit only when repair will not hold.
— Sharim
Need a leaking door sorted in Auckland?
We supply, install and repair aluminium windows and doors across Greater Auckland, for homes and commercial properties. If your door needs new seals, hardware or drainage work, our aluminium window and door repairs service is the place to start. If it is past repairing, we can quote on full replacement or insert windows and doors, including entry doors, sliding doors, French doors and bifold doors.

Tell us what you are seeing and where, and send photos if you can. We will tell you honestly whether it needs a repair or a new unit.
Choosing a replacement that will stay dry
If you do replace, a few choices reduce the chance of a repeat.
- Match the door type to the exposure. Sheltered spots suit almost anything. Exposed, south-facing openings take the worst of the weather, so pay close attention to threshold and seal design there. Our guides to entry doors NZ homeowners prefer and modern entry doors in Auckland go through the options.
- Ask how the junction is flashed. The installer should be able to explain how water is shed above and beside the frame, and what sits under the sill.
- Keep drainage working. Ask where the weep paths are and how to keep them clear.
- Ask what the warranty covers. Workmanship warranties and product warranties are different things. Get both in writing.
- Consider French doors. If you are replacing a tired timber pair, see our aluminium French doors guide for how modern units seal.
FAQ
How do I stop rain getting in under my door?
First check that drainage slots in the track are clear and that the bottom seal is intact. Then confirm the door closes fully and compresses its seals. If water still enters, the threshold, sill detail or flashing is probably at fault and needs a professional look.
Can I replace a door sweep without removing the door?
Often, yes. Some screw-on seals are designed to be fitted with the door in place, such as the Moroday MDS5 listed by Bunnings NZ, which suits gaps of 10 to 20 mm. Measure your gap and check the door type before you buy.
Will a slow leak seal itself?
No. Seals and joints do not repair themselves, and water that keeps getting in can reach framing and linings out of sight. Test the door with a hose, fix the cause, and have it assessed if you find stains or soft timber.
Is a draughty door the same as a leaking door?
Not exactly, but they are related. Both come from gaps, and wind pressure can push rain through the same gaps that let air in. Fixing the draught with proper seals and alignment often reduces water entry too, as EECA's draught guidance suggests for poorly fitting doors.
Who is responsible if my new door leaks?
Start with the installer. The Consumer Guarantees Act requires work to be done with reasonable care and skill, and the Building Act adds warranties for residential building work. Contact them in writing with photos, and ask for the fix at no cost.
Sources
- External moisture: an introduction to weathertightness (Building Performance)
- Stopping draughts (Building Performance)
- Reduce draughts in your home to save energy (EECA)
- Compliance Document for NZ Building Code Clause E2 External Moisture
- Airtight buildings causing moisture issues (BCTRAG, 2020)
- Weathertightness: Guide to the Diagnosis of Leaky Buildings
- Constructing cavities for wall claddings
- Dampness and ventilation: renter's guide (Consumer NZ)
- Windows and doors (Consumer NZ)
- Home renovation: building disputes (Consumer NZ)
- How to weatherproof commercial storefront doors (CDF Distributors)
- How to identify water leaks around your front door frame (Thermoseal)
- Moroday MDS5 screw-on door seal (Bunnings NZ)